You can adjust the theme settings to your needs and modify how your website looks like in the Customization area.
MENUS AND PAGES
To start adding your categories, first go to the Customization menu → General and click Create button to add default pages and menus.

To create product categories, go to Products → Product Categories and select categories you want to Edit or create a new one. To create a subcategory, add its name and select the corresponding parent category. Click Add a New Category.

Once your product categories are created, you can proceed with organizing your website menus. There are 3 of them available in the Rubens theme:
Main Menu
two menus located in Footer
To manage them, go to Appearance → Menus and select a menu to make changes to or create a new one. Check items which should be added to your menu in the left-hand sidebar.
Drag items to change their display order and move them to the right to make sub items. You can edit them by clicking the down arrow symbol.

To make sure you see all groups of items, click Screen Options at the top of the page and check groups you want to add to menu.

After you have finished editing your menu, check corresponding display location at the bottom of the page in Menu Settings. Click Save Menu.

Alternatively, you can use Manage with Live Preview at the top of the page to see changes on your website front-end as you make them.
CUSTOMIZATION
General
In the General section you can edit some basic configuration settings:
upload your favicon
show discount badges on products ('On Sale' or '- %')
enable the LazyLoad option (Homepage, Category page and Single product page)
show star product rating (Homepage and Category page)
show one product per row on Category page (mobile)

Customize your template colors:

Head
You can add and edit scripts and styles in Head.

Header
Upload your website logo (you may add two versions of your logo, dark and light), manage sticky header settings and adjust colors.

Home
You can modify the way your homepage looks like: change titles and their colors, adjust font size, manage rotation, etc.

Upload your slider images (you can use the same banner, which is displayed on desktop, for mobile version of your website or add another image).

Manage your Product block settings: you can enable/disable and rename them.

Make your latest two blog articles appear on Homepage by enabling the blog option. Add a Homepage article above Footer.

Single product
Manage your single product page settings in the Single product tab: enable pre-selected variations, manage product information tabs, show social share icons, and many more.


Checkout
Learn how to customize your Shopping cart here.

Manage the required Checkout fields by adjusting the toggles.

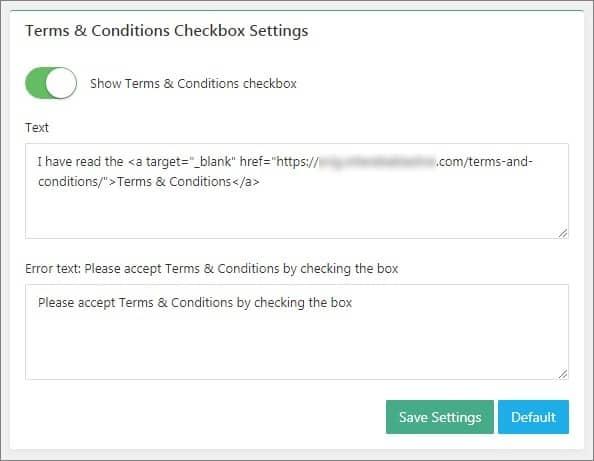
Show Terms & Conditions checkbox on the last Checkout step to make sure your clients accept your website policy.
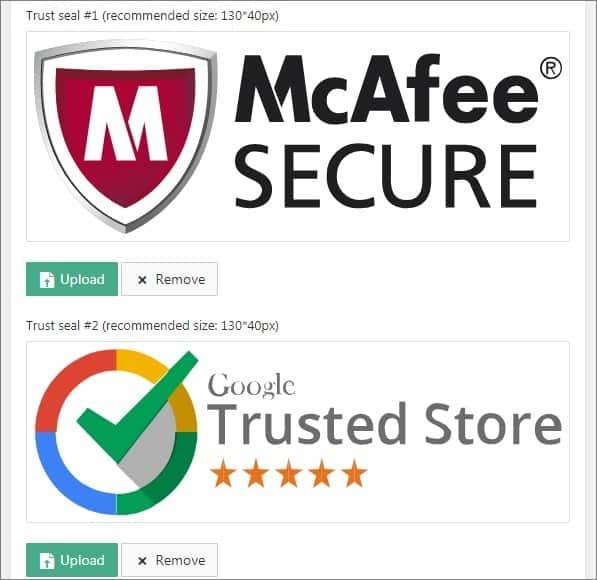
Use the default trust seals or upload your own to add credibility to your store.
Pick colors for the checkout buttons to meet your design objectives. Add your contact details and a link to a page that is important to your Checkout process.

About Us
Tell your customers more about your business: edit the About Us text so that it tells your company’s story and upload a background image.

Enable or disable the Our Core Values block, encourage your customers to keep in touch with you and benefit from telling more about your business partners.

Thank You
Add a background image for your Thank you page. You can edit text which is shown to your client when a payment is complete or it failed and add conversion tracking scripts.

Contact Us
Add your email address and edit text displayed on the Contact Us page above your contact details.

Social Media
To add your social media links, go to Social Media and fill in the appropriate fields.

Footer
Adjust your footer colors and enable/disable back-to-top button. Keep in mind that this button looks differently on mobile devices. Manage your payment methods icons.

